In the post, Build a Pre-Created Oracle Home Image for Database Provisioning with Oracle Enterprise Manager 11gR1 Grid Control, I detailed how to build an image of an Oracle Database Home that was already installed and possibly patched to be used for provisioning of the Oracle Database. In this post I will detail how to deploy that image to a new host.
Licensing Notice: Using Oracle Enterprise Manager Grid Control (10g and 11g) to deploy software and patches requires a license for the Database Provisioning and Patch Automation Pack for patching, Configuration Management Pack for Oracle Database and the Configuration Management Pack for Applications if you wish to deploy other application.
Assumptions
This post assumes a few prior installation and configuration steps have already been completed. Fortunately details for all have already been posted. This post assumes you have Grid Control installed as detailed in Installing Oracle Enterprise Manager Grid Control 11gR1 on Linux, the agent has already been installed, see Setup Agent for Mass Deployment in Oracle Enterprise Manager 11gR1 Grid Control on the server in which the image is to be applied, the Software Library has been configured as described in Configuring the Software Library for Oracle Enterprise Manager 11gR1 Grid Control and that a suitable home image has already been created and added to the Software Library as described in Build a Pre-Created Oracle Home Image for Database Provisioning with Oracle Enterprise Manager 11gR1 Grid Control.
Click on the Deployments tab.
On the Deployments page scroll down to the Deployment Procedure Manager section and click on the Database Provisioning Procedures link.
Out of the box, Oracle Enterprise Manager 11gR1 Grid Control contains deployment procedures for database, grid infrastructure and database replay client provisioning. These deployment procedures cannot be edited but can be used as a template to create our own deployment procedure.
On the Deployment Procedure Manager page select Oracle Database Provisioning procedure and click the Create Like button.
On the Create Like Procedure page you will see all the configuration steps Oracle considers best practices for Oracle Database installation. In most cases you should not need to change any of these procedures but you can if needed. For this example the Name and the Description fields were changed.
Click the Save button after making your changes to save the new provisioning procedure.
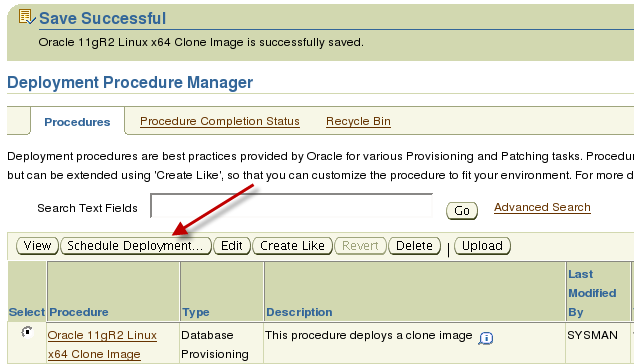
After clicking the Save button you should be returned to the Deployment Procedure Manager page with a success message displayed. You should also see your new procedure in the list.
Schedule the Deployment
Now it is time to try out our new procedure. Select the procedure and click the Schedule Deployment button.
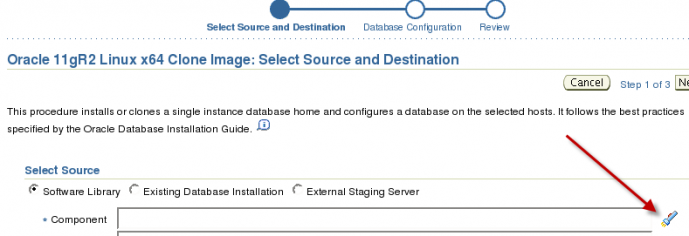
On the Select Source and Destination page we will need to provide the component to use for this procedure. Under the Select Source heading select Software Library and click the flashlight icon to the right of the Component field.
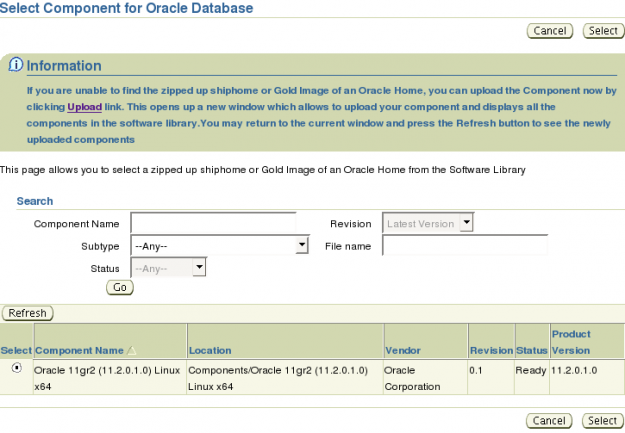
A pop up window will appear that allows you to choose the component to use. Select component we created in the last post, or an image you create earlier and click the Select button to select to continue.
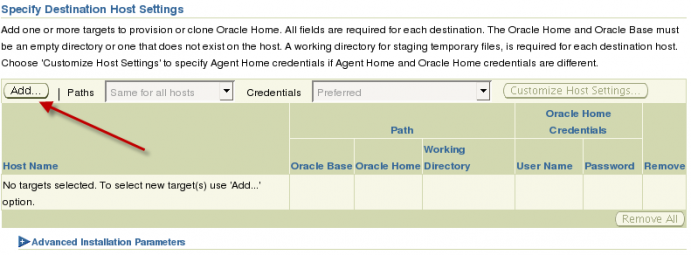
Next we need to provide a host in which to deploy the image. Under the Specify Database Host Settings click the Add button.
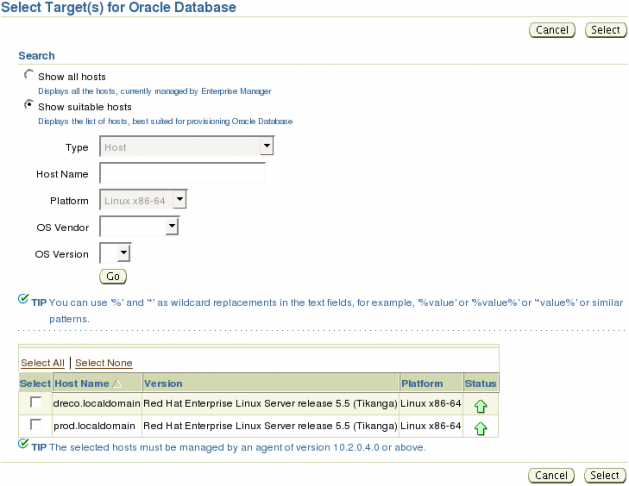
Once you click the Add button another pop up window will appear that allows you to choose the host in which to deploy. By default hosts that are suitable to receive the image are selected. In this example we want to deploy to the host prod.localdomain. Select the host and click the Select button to continue.
Back on the Select Source and Destination page you can now set Oracle Base, Oracle Home and Work Directory location for this deployment. You can also add other hosts in which to deploy. In the case of multiple host deployments you can use the drop down for path and credentials to tailor the paths for and credentials used for each host.
Note: The default values presented for the Oracle Base and Oracle Home are the same. Verify that they are the values you would want for the Oracle Base and Oracle Home for your system.
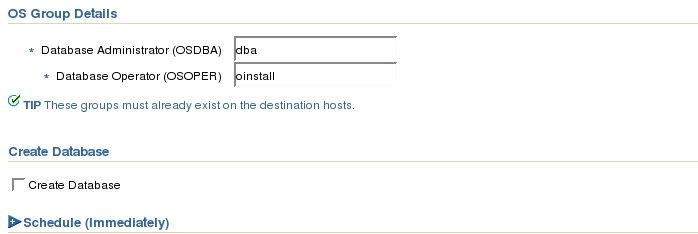
Next you can set the groups to use and whether you want to create a database or not in this deployment. By default this job is scheduled to execute immediately but you can choose to execute it at a later time.
Note: The default groups are dba and oper. You might need to change these to match your environment.
After you have made all of your changes click the Next button to continue.
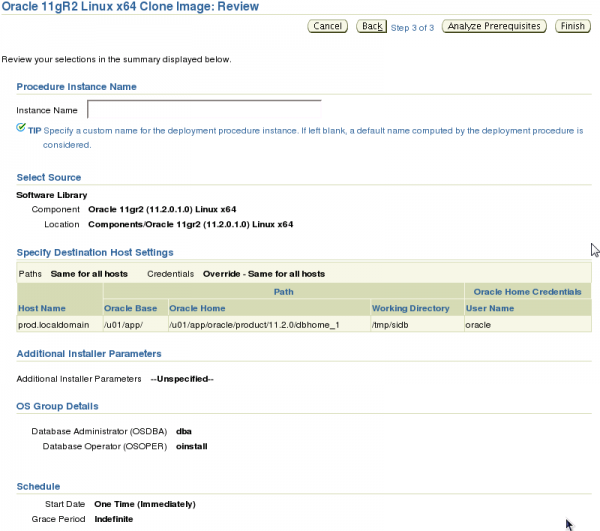
The last page is the Review page. Here you can review the choices made for this deployment prior to deployment. On the Review page you can provide a name for the deployment job or allow the system to generate a name.
You can analyze the prerequisites first. In building this document I found that when you analyze the perquisites that you are not returned back to this page and it did not appear that the job to deploy was created. So if you do decide the check the prerequisites keep in mind you might need to reschedule the deployment again.
Otherwise click the Finish button to submit the job.
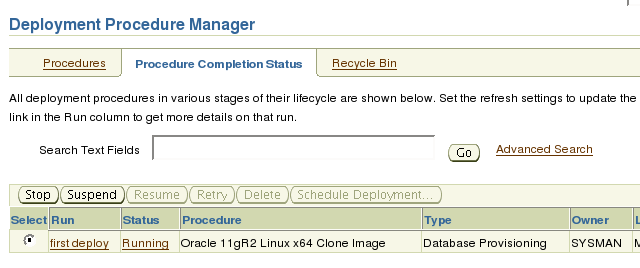
After clicking the Finish button you are taken back to the Procedure Completion Status section of the Deployment Procedure Manager page.
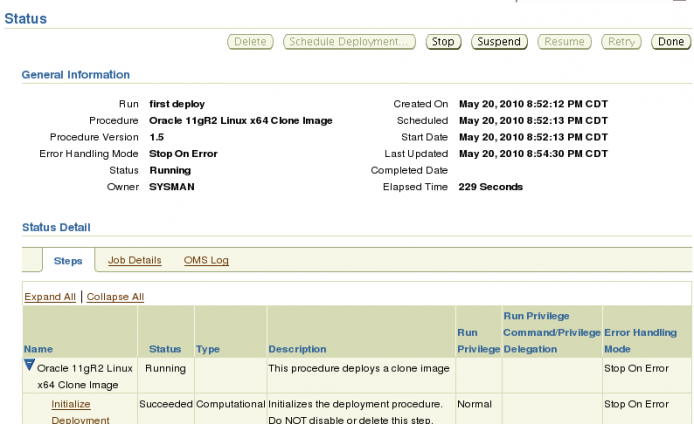
Here you will see that our deployment is currently running. Click on the link in the Run column to be taken the deployment status page.
You can click on the links for each step to get detailed information concerning the step. This job will run for a little while. As a high level overview, this job is copying the image made previously to the prod.localdomain server. Once the files are copied the will be placed in the Oracle Home location we specified. The new home will be added to the existing inventory. There are a lot of steps and checks done in addition to this high level overview.
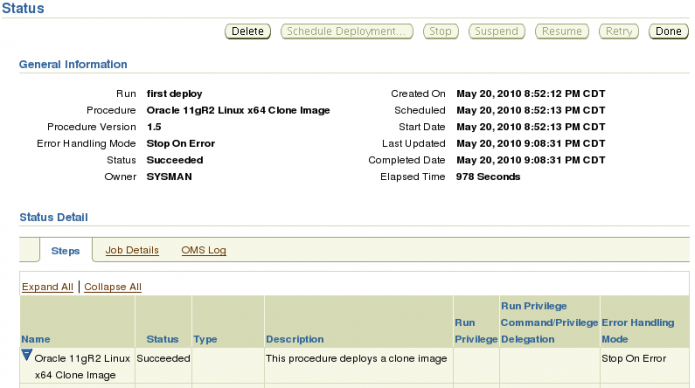
Soon the job will complete and the status should show succeeded.
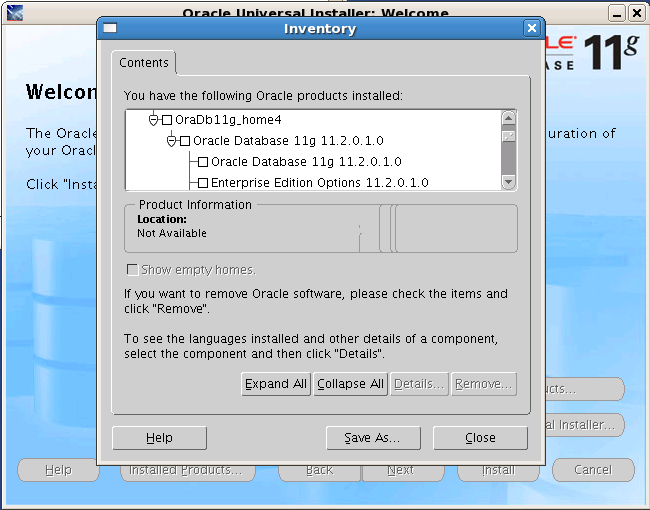
You can verify the deployment by logging on to the host and doing a few checks.
[oracle@prod ~]$ export ORACLE_HOME=/u01/app/oracle/product/11.2.0/dbhome_1
[oracle@prod ~]$ ls $ORACLE_HOME
apex         demo              jlib     oracore         scheduler
assistants   diagnostics       ldap     oraInst.loc     slax
bin          dv                lib      ord             sqldeveloper
ccr          emcli             log      oui             sqlj
cdata        has               md       owb             sqlplus
cfgtoollogs  hs                mesg     owm             srvm
clone        ide               mgw      perl            sysman
config       install           network  plsql           timingframework
crs          install.platform  nls      precomp         ucp
csmig        instantclient     oc4j     racg            uix
css          inventory         ocm.rsp  rdbms           utl
ctx          j2ee              odbc     relnotes        wwg
cv           javavm            olap     root.sh         xdk
dbs          jdbc              ons      root.sh.old
dc_ocm       jdev              OPatch   root.sh.old.1
deinstall    jdk               opmn     root.sh.ouibak
[oracle@prod ~]$ /u01/app/oracle/product/11.2.0/dbhome_1/oui/bin/runInstaller
Starting Oracle Universal Installer...

Checking swap space: must be greater than 500 MB.   Actual 7999 MB    Passed
Checking monitor: must be configured to display at least 256 colors.    Actual 16777216    Passed
Preparing to launch Oracle Universal Installer from /tmp/OraInstall2010-05-20_10-04-12PM. Please wait ...[oracle@prod ~]$ Oracle Universal Installer, Version 11.2.0.1.0 Production
Copyright (C) 1999, 2009, Oracle. All rights reserved.



This init’hsgs just the way to kick life into this debate.