If you would like to experiment with Oracle ASM or Oracle Restart you will need to install the Oracle Grid Infrastructure. Oracle Grid Infrastructure can be installed for a cluster or a standalone server.
This document will detail the steps to install Oracle Grid Infrastructure 11gR2 on Oracle Enterprise Linux 5.5 and assumes that devices have already been prepared for ASM.
Create the OS user and Groups that will own the Grid Infrastructure
In prior releases the grid and databases software were owned and managed by the same OS user. Oracle 11gR2 Grid Infrastructure allows for separation of management of the Grid Infrastructure services and database services. While the same OS user and groups can own the both sets of services it is not recommended. In this tutorial will follow the recommendation of a separation of duties.
Create user oragrid
Groups: oinstall, asmadmin, asmoper, asmdba
[root@newhost ~]# groupadd asmadmin
[root@newhost ~]# groupadd asmoper
[root@newhost ~]# groupadd asmdba
[root@newhost ~]# useradd -g oinstall -G asmadmin,asmoper,asmdba oragrid
[root@newhost ~]# passwd oragrid
Oracle Grid Infrastructure 11gR2 can be downloaded from the Oracle Technology Network (http://www.oracle.com/technetwork/database/enterprise-edition/downloads/index.html)
After downloading and uncompressing Oracle Grid Infrastructure, change to the grid directory and execute runInstaller.
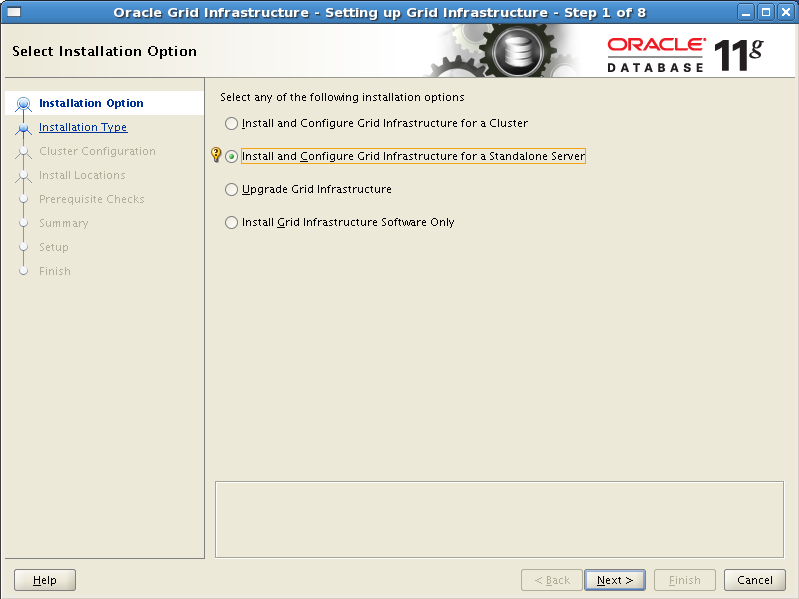
Select Install and Configure Grid Infrastructure for a Standalone Server. Click the Next button to continue.
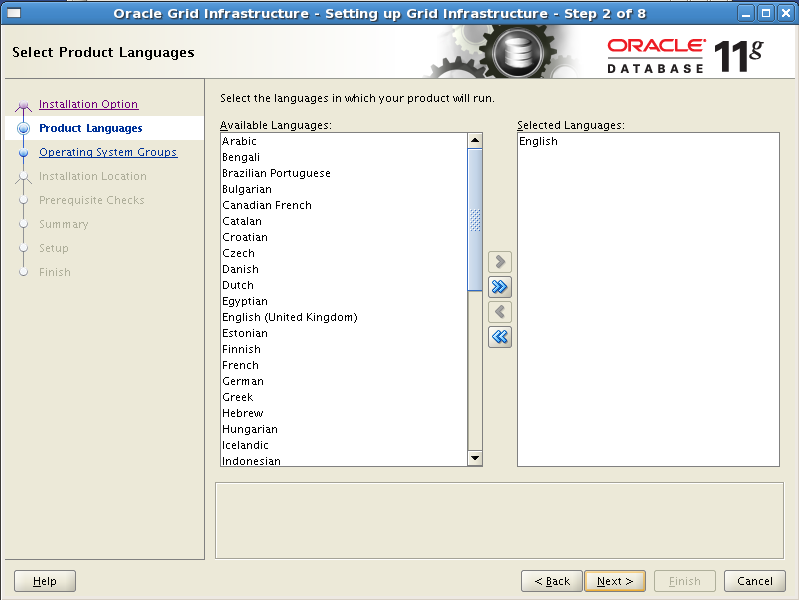
Select the languages for your installation. After selecting required languages click the Next button to continue.
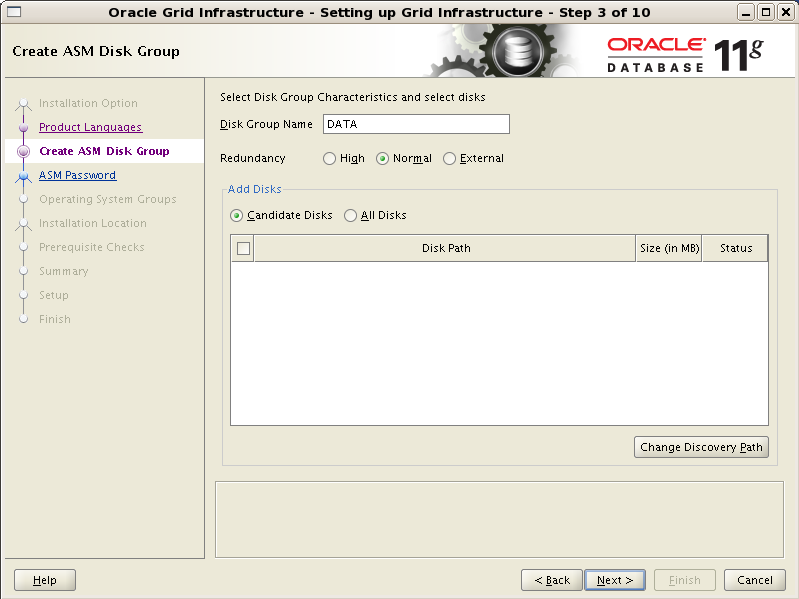
On this step one or more diskgroups can be created. Notice that there are no disks listed this is most likely due to fact that the disk discovery path is not set properly. Click the Change Discovery Path button to bring up a dialog to enter a new path.
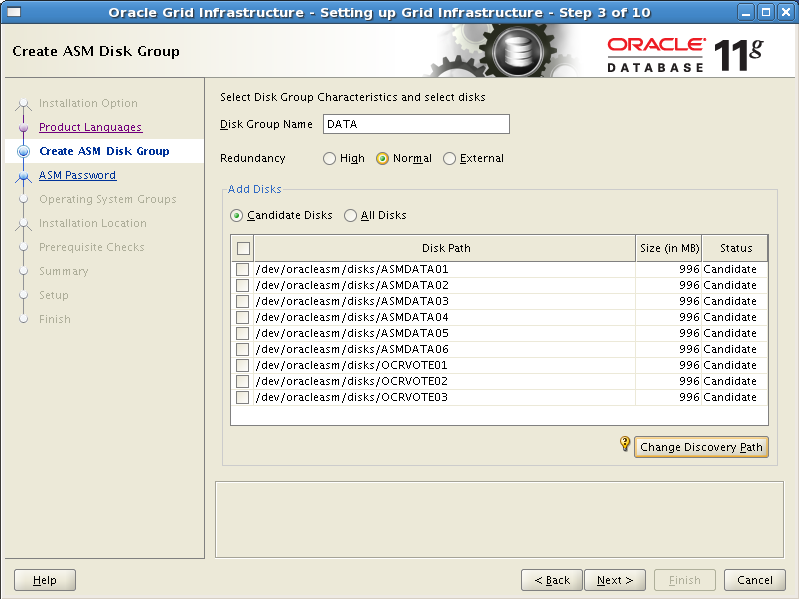
After entering the path and clicking the OK button the list of ASM disks on the system will be displayed.
Now that we have the list of candidate disks it is now possible to create the disk group. You will need to provide a name for the disk group, the redundancy level and the disks that will make up the disk group. Redundancy determines the level of file mirroring in the disk group. Normal redundancy can provide 2 to 3-way mirroring and High redundancy can provides 3-way mirroring. External Redundancy is for drives that already have mirroring.
After selecting the disks click the Next button.
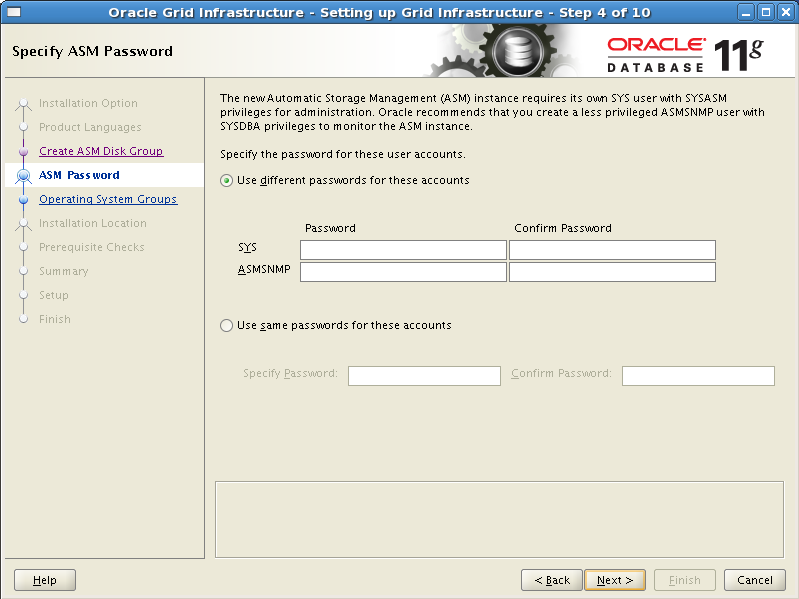
In prior releases of ASM the user used for monitoring the ASM instance was SYS. In 11g Oracle introduces as the ASMSNP user that has fewer privileges than SYS. You have the option of setting a different password for each or to use the same password. After entering your passwords click the Next button.
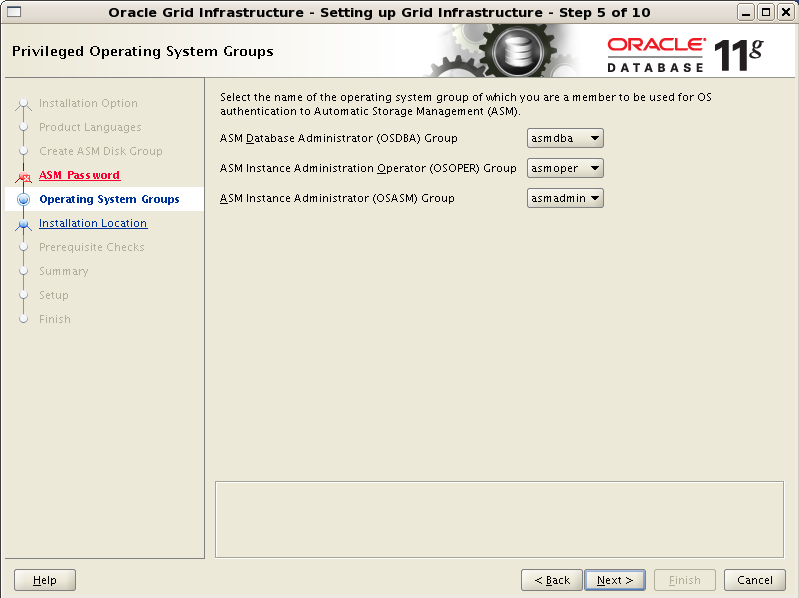
If you created the groups outlined earlier, the correct group will be selected. If you are installing Grid Infrastructure under the standard Oracle user account you will see different groups. Once you have selected the groups click the Next button to continue.
Note: If you are installing Oracle Grid Infrastructure as the standard Oracle user and groups you will receive a warning dialog stating that. Simply acknowledge the use of the oracle user and groups to continue.
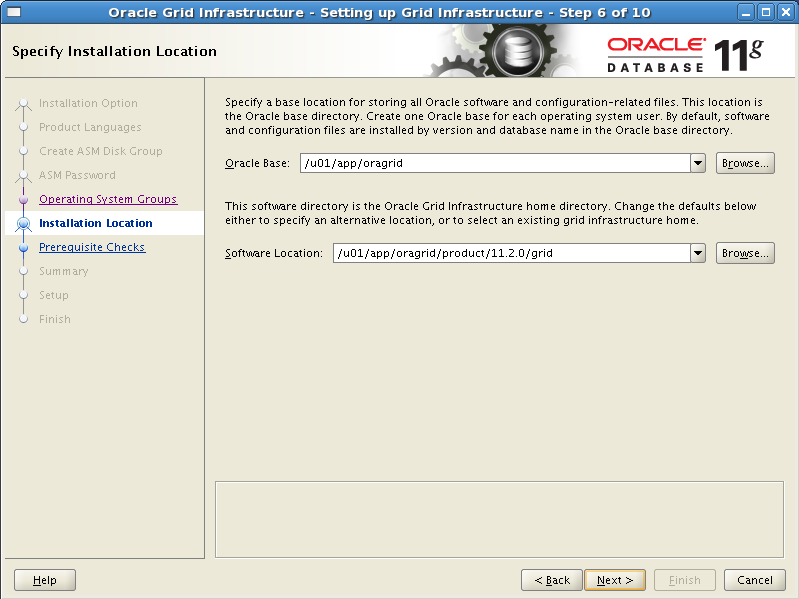
After validating the install directory click the Next button to continue.
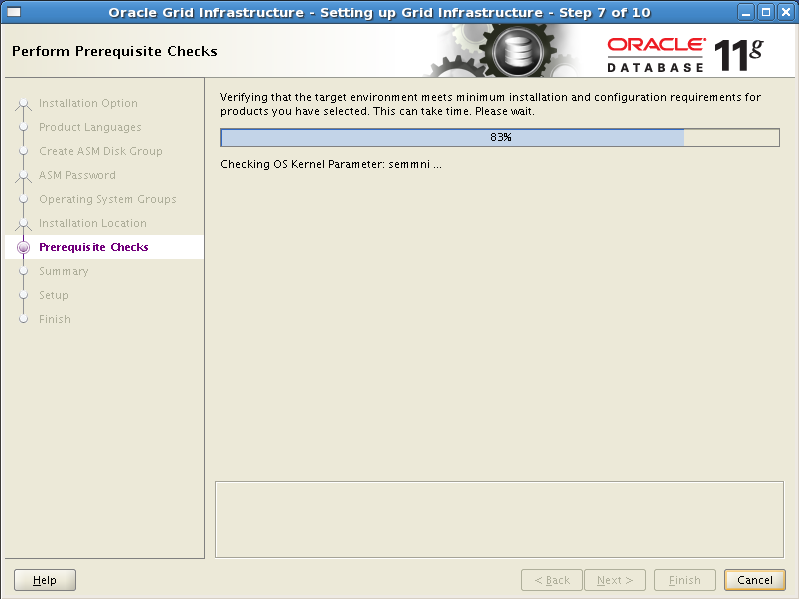
After pre-req checks the Summary page displays. Click the Finish button to start the installation.
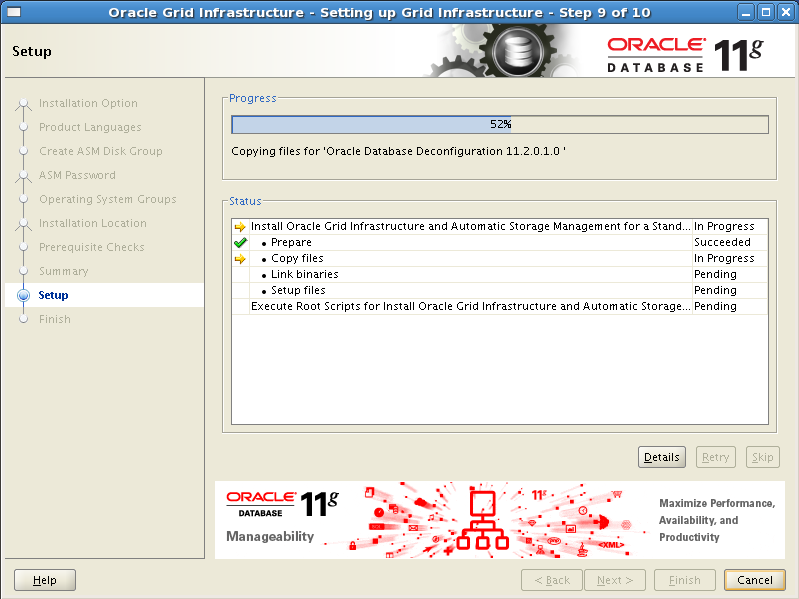
During the installation the familiar installation progress screen will detail the progress of the installation.
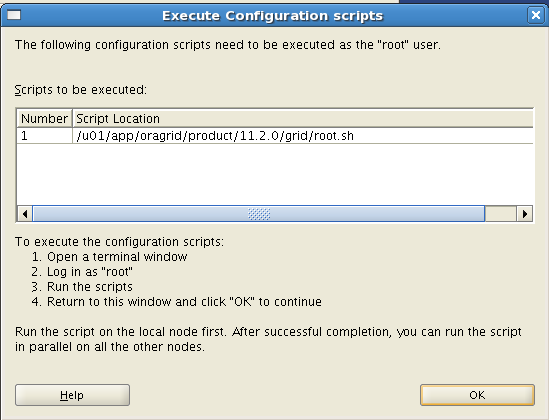
At the end of the installation t root scripts will need to be executed. In terminal window executed the listed root.sh script as the root user.
[root@newhost ~]# /u01/app/oragrid/product/11.2.0/grid/root.sh
Running Oracle 11g root.sh script...

The following environment variables are set as:
    ORACLE_OWNER= oragrid
    ORACLE_HOME=  /u01/app/oragrid/product/11.2.0/grid

Enter the full pathname of the local bin directory: [/usr/local/bin]:
The file "dbhome" already exists in /usr/local/bin.  Overwrite it? (y/n)
[n]:
The file "oraenv" already exists in /usr/local/bin.  Overwrite it? (y/n)
[n]:
The file "coraenv" already exists in /usr/local/bin.  Overwrite it? (y/n)
[n]:

Entries will be added to the /etc/oratab file as needed by
Database Configuration Assistant when a database is created
Finished running generic part of root.sh script.
Now product-specific root actions will be performed.
2011-07-26 13:39:49: Checking for super user privileges
2011-07-26 13:39:49: User has super user privileges
2011-07-26 13:39:49: Parsing the host name
Using configuration parameter file: /u01/app/oragrid/product/11.2.0/grid/crs/install/crsconfig_params
Creating trace directory
LOCAL ADD MODE
Creating OCR keys for user 'oragrid', privgrp 'oinstall'..
Operation successful.
CRS-4664: Node newhost successfully pinned.
Adding daemon to inittab
CRS-4123: Oracle High Availability Services has been started.
ohasd is starting

newhost     2011/07/26 13:40:35     /u01/app/oragrid/product/11.2.0/grid/cdata/newhost/backup_20110726_134035.olr
Successfully configured Oracle Grid Infrastructure for a Standalone Server
Updating inventory properties for clusterware
Starting Oracle Universal Installer...

Checking swap space: must be greater than 500 MB.   Actual 4094 MB    Passed
The inventory pointer is located at /etc/oraInst.loc
The inventory is located at /u01/app/oraInventory
'UpdateNodeList' was successful.
[root@newhost ~]#
After completion of the root scripts click the OK button in the dialog.
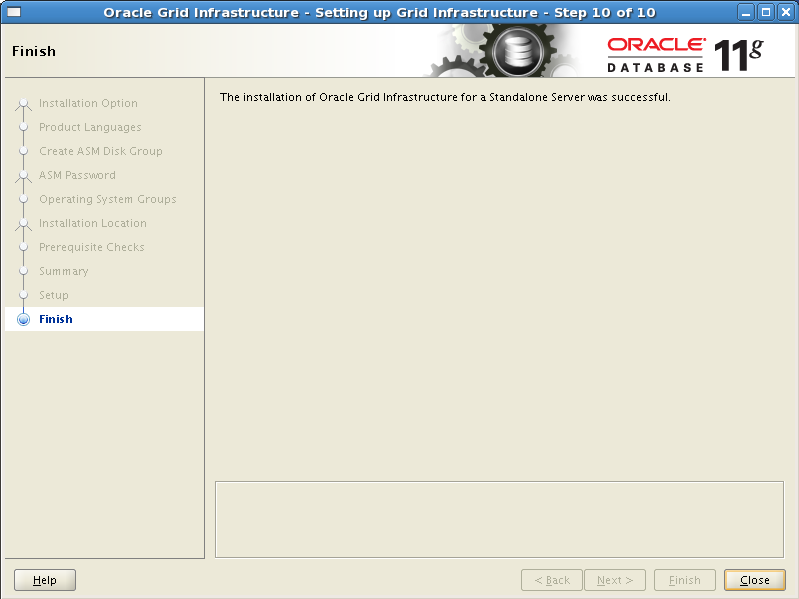
At the end of the installation you can see that the ASM instance is up and running.
[oragrid@newhost grid]$ ps -ef | grep pmon
oragrid   8888     1  0 13:42 ?        00:00:00 asm_pmon_+ASM
oragrid   8952  3526  0 13:44 pts/1    00:00:00 grep pmon
[oragrid@newhost grid]$
Using crs_stat you can see all the services up and running. Each of these services are set to start on boot.
[oragrid@newhost grid]$ crs_stat
NAME=ora.DATA.dg
TYPE=ora.diskgroup.type
TARGET=ONLINE
STATE=ONLINE on newhost

NAME=ora.LISTENER.lsnr
TYPE=ora.listener.type
TARGET=ONLINE
STATE=ONLINE on newhost

NAME=ora.asm
TYPE=ora.asm.type
TARGET=ONLINE
STATE=ONLINE on newhost

NAME=ora.cssd
TYPE=ora.cssd.type
TARGET=ONLINE
STATE=ONLINE on newhost

NAME=ora.diskmon
TYPE=ora.diskmon.type
TARGET=ONLINE
STATE=ONLINE on newhost

[oragrid@newhost grid]$
With the Grid Infrastructure and ASM installed you are now ready to install the database.



This is good document, when i am installing Oracle Grid Infrastructure Step # 1 of 8 (see in above snap) does not appear, what is the pre-requiste for appearing this option. Please guide.
Hi there,
you’re not in 11GR2.
This is new in 11GR2.
Before you were able to create an ASM instance without GI.
Bhai Kya Post Diya hai baap….
Meaning Wat a knowledge sharing Sir….
Sarfaraz
Very Useful
adad
You are right the discovery path was not /dev/oracleasm/disks. It worked for me. Thank you!
In second step , configure Grid infrastructure for a standalone server option only shows and when process with this option, fine work but after restart the server, unable to start database