MySQL is the most popular Open Source relational database. As part of the LAMP stack, MySQL is integral in many Open Source projects such Nagios, Bugzilla and WordPress to name a few. Companies such as McAfee, Novell and UPS use MySQL database in their environments not to mention some large scale web sits such as Google and Facebook.
In January 2010 Oracle acquired MySQL in the purchase of Sun Microsystems and now MySQL is part of the ever growing portfolio or products offered by Oracle. This document will detail the steps to install MySQL and create an instance on the Windows Operating system.
Download and Install MySQL
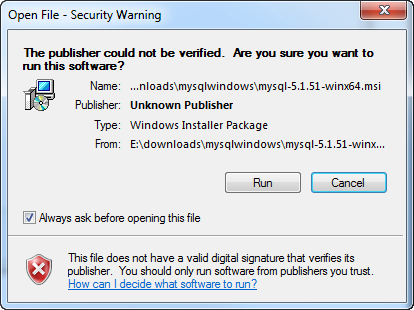
MySQL Community Server can be downloaded from http://www.mysql.com/downloads/. This document used the mysql-5.1.51-winx64.msi install package. Once the download is complete double click the mysql-5.1.51-winx64.msi to start the installation. Depending on your version of Windows you may prompted to verify you want to run the installer.
Click the Run button to continue.
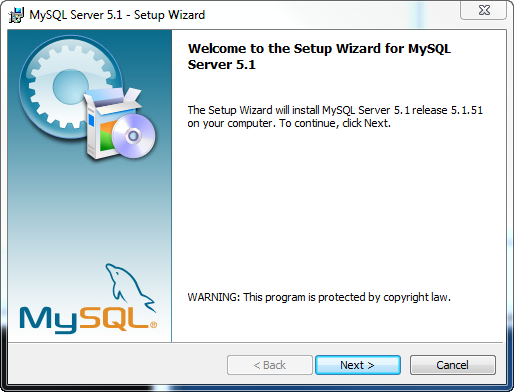
Click the Next button to continue.
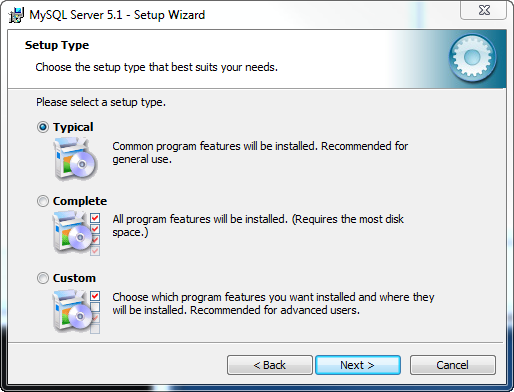
There are three install options: Typical, Complete and Custom. Typical and Complete will not allow you to change the installation or data files directories which defaults to C:\Program Files\MySQL\MySQL Server 5.1\ for both. If you would like to separate the installation files from the data files click the Custom radio button and click the Next button to continue.
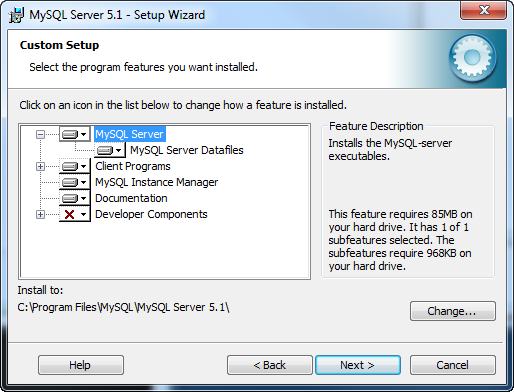
You can change the installation options by clicking the drive icon drop down.
If the drop down selected was a root item you will have the option to install the root item all children with one selection. You can expand the root items by clicking the plus symbol.
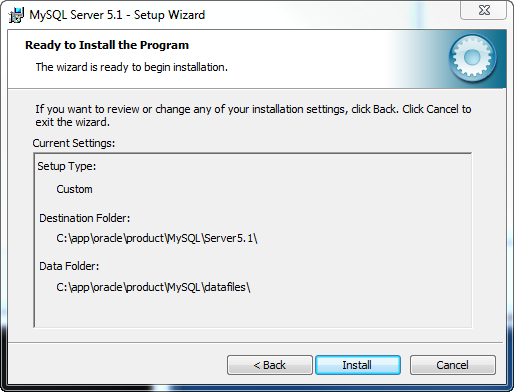
You can change the installation directory by selecting the installation item and clicking the Change… button. If you change the directory for the MySQL Server node, the new directory will be reflected in all other nodes with the exception of the MySQL Server Datafiles. In this example we used C:\app\oracle\product\MySQL\Server5.1\ for the base installation directory and C:\app\oracle\product\MySQL\datafiles for the data files location.
After making your changes click the Next button to continue.
On the confirmation screen the Setup Type and destination folders will be displayed. If you need to make any changes click the Back button otherwise click the Install button to begin the installation.
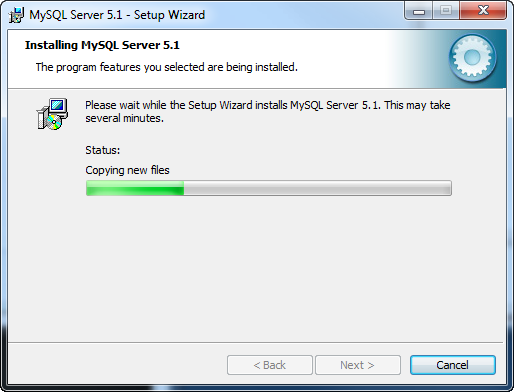
During the installation you might be asked to allow the installation program to modify the system due to Windows User Access Controls.
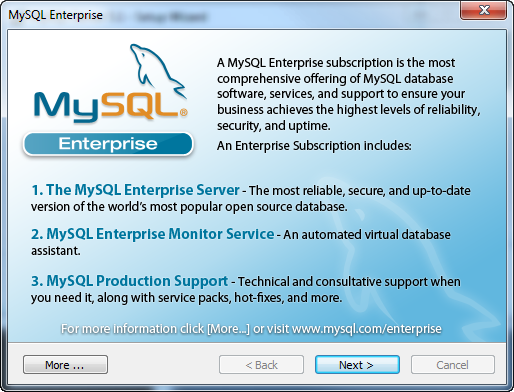
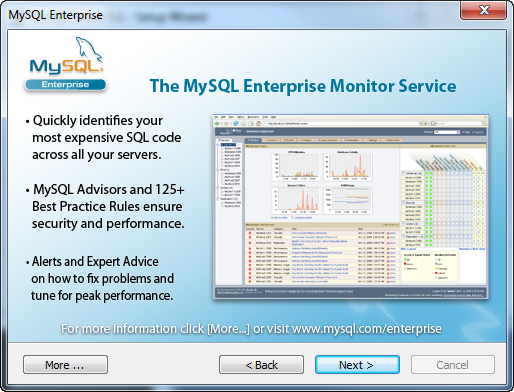
Once the installation is complete two information dialogs for MySQL Enterprise will be presented next.
Click the Next button to continue.
Click the Next button to continue.
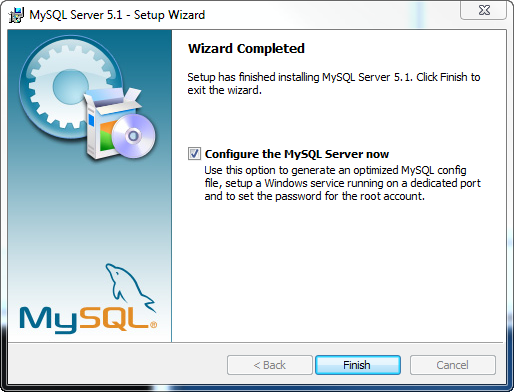
The last piece of the installation is the configuration of the MySQL instance. By default the option Configure the MySQL Server now is selected, however you can run the instance configuration later if needed.
Click the Finish button to start the MySQL Server Instance Configuration Wizard. You may be asked to allow the Wizard to modify the system due to Windows User Access Controls.
MySQL Server Instance Configuration Wizard
The MySQL Server Instance Configuration Wizard is used to configure or reconfigure the MySQL instance on the machine. If the Wizard is execute on a new server install the first dialog will be the welcome dialog below.
Click the Next button to continue.
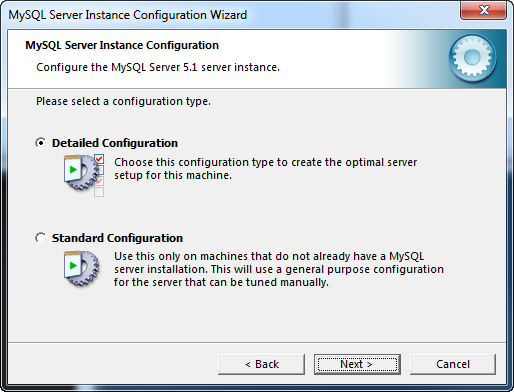
There are two instance configuration options Detailed and Standard. The Standard Configuration sets all configuration options to default values. If this instance is the only instance on the machine and it its intended usage is development, the Standard Configuration would be a good choice. However, if there are other MySQL instances on the machine or require more control over the configuration then the Detailed Configuration should be used.
This document will go through the Detailed Configuration.
Click the Next button to continue.
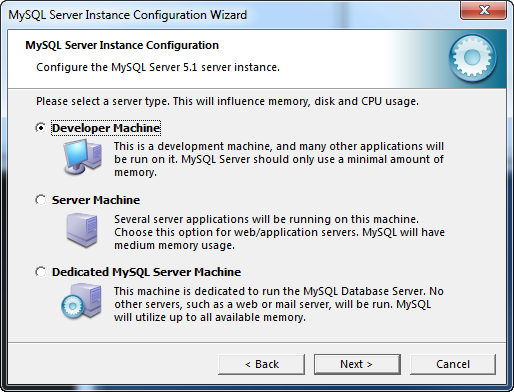
The Server Type dialog provides three options Developer, Server, and Dedicated Server. Each of these options are used to determine how much of the machines resources are to be used by the MySQL instance.
Select the server type for your installation and click the Next button to continue.
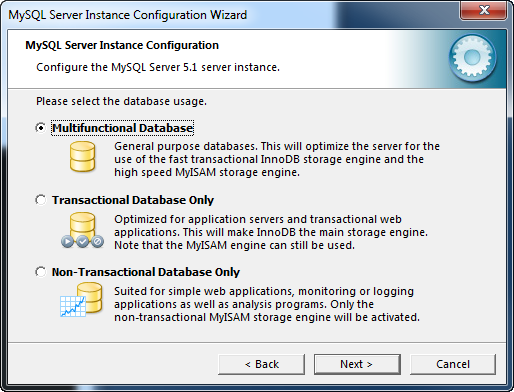
On the Database Usage Dialog allows you to indicate which storage engines should be available to store data. There are two storage engines available each with specific characteristics.
The InnoDB storage engine allows for transaction safe table to be created. Transaction safe tables with autocommit disabled allow you to combine many statements and commit all the same time or rollback the changes. The InnoDB engine provides enhanced concurrency handling in the case of multiple read/write. Locking is at the row level with InnoDB.
The MyISAM storage engine does not prove the ability to create transaction safe tables and locking is at the table level. Because there is no transaction overhead, the MyISAM storage engine provides greater performance that the InnoDB storage engine.
The Multifunctional Database template provides the both the InnoDB and MyISAM storage engines with server resources divided between the two. The Transactional Database template also provides both storage engines but most of the server resources are dedicated to InnoDB. The Non-Transactional Database template only provides the MyISAM engine with all server resources dedicated to MyISAM.
After selecting the database usage, click the Next button to continue.
The InnoDB data files can be stored in another location other than the default location for data files. You can use this dialog to configure another location in which to store InnoDB data files.
Click the Next button to continue.
On this dialog the number of expected concurrent connections is configured. You can either provide a number for the maximum concurrent connections or choose between the Decision Support and Online Transaction Processing templates.
The Decision Support template provides maximum of 100 connections with an average of 20 concurrent connections. The Online Transaction Processing template sets the maximum number of connection to 500.
After setting the maximum number of connections click the next button to continue.
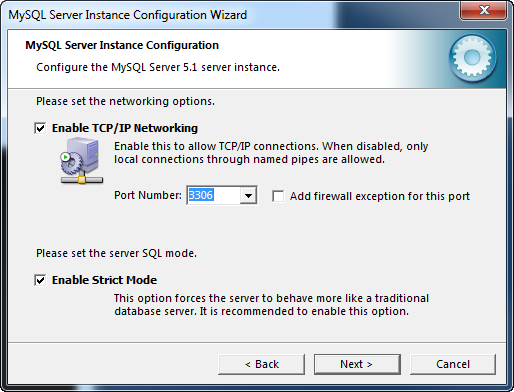
The Networking Options dialog is used to enable or disable TCP/IP networking and to configure the port number for the MySQL server.
TCP/IP networking is enabled by default with the default port number of 3306. If TCP/IP networking is disabled only connections originating from the local machine using named pipes are allowed.
The other option is setting the SQL Mode. MySQL can operate in different SQL modes allowing each connection to custom tailor the server’s operating environment. The recommend default option is to enable Strict Mode.
After making your selections click the next button to continue.
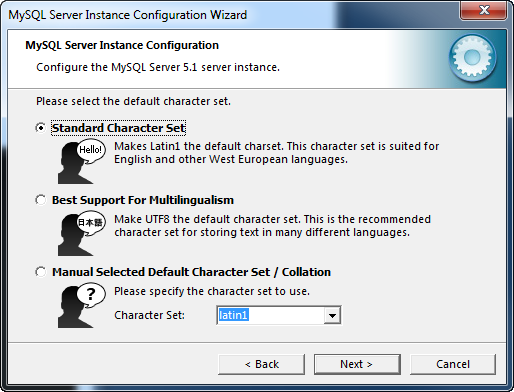
You can set a default character set to be used for all databases unless overridden using the Character Set dialog. You can choose a character set manually or select between the Standard and Best Support for Multilingualism templates. The Standard Character Set template uses Latin1 as the character set and the Best Support for Multilingualism uses UTF8 which is a Unicode character set.
In this example the Best Support for Multilingualism was selected. After making your selections click the Next button to continue.
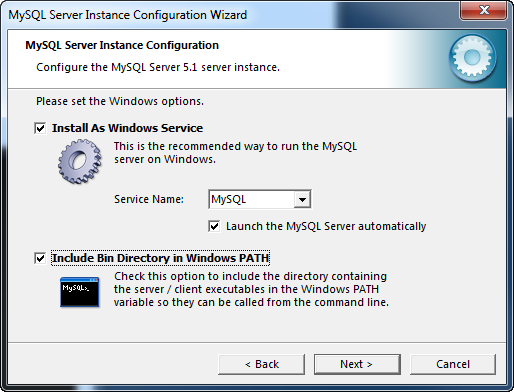
On Windows systems the MySQL instance can be configured as a service. By default the service name is MySQL which you can change either by selecting a name provided in the drop down or by entering a name of your choice. Keep in mind that service names must be less than 256 characters and can cannot in include the forward (/) or backward (\) slashes. You can also choose to have the installation directory containing the executables for the client and server to PATH environment variable.
Click the Next button to continue.
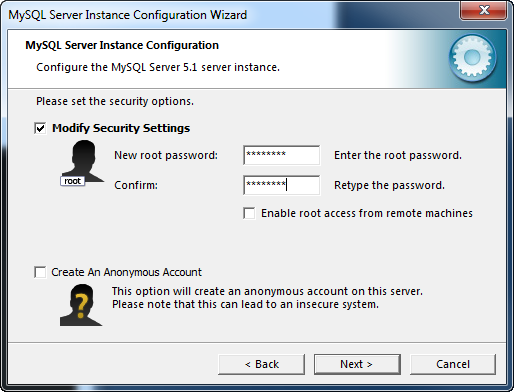
It is strongly recommended that a password be set for the root user. If you do not want to set a root password you can uncheck the Modify Security Settings box. By default the root user can only connect to the instance from the local machine. If you need to be able to connect as root from a remote machine you can check the Enable root access from remote machines box. Enabling remote root access and creating an anonymous account could compromise the security of the instance.
After setting the password click the Next button to continue.
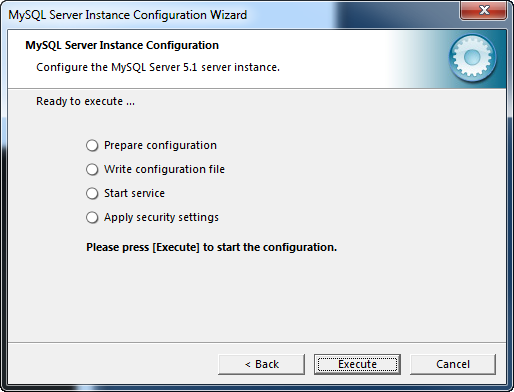
To execute the selected configuration click the Execute button. If you need to make changes click the Back button.
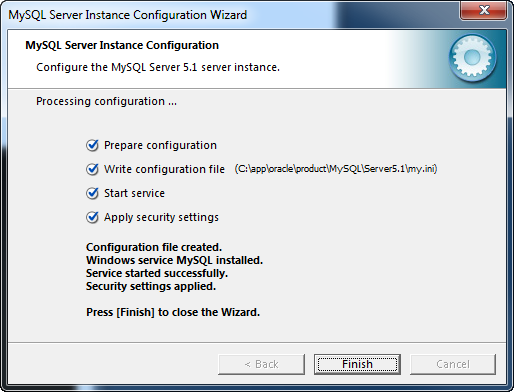
Once the configuration is successfully deployed you should see an updated screen similar to the one below.
Click the Finish button to exit the Wizard.
The installation and configuration of the MySQL instance is now complete. You can verify that the instance is up and running with the mysqlshow command.
C:\ >mysqlshow -u root -p
Enter password: ********
+--------------------+
|     Databases      |
+--------------------+
| information_schema |
| mysql              |
| test               |
+--------------------+

C:\ >





i like it!
awesome
Hi! I could have sworn I’ve bbeen to this site before but after browsing
through some of the articles I realized it’s new to me. Anyways, I’m definitely happy I stumbled upon it and I’ll be bookmarking iit and checking back often!