This document will detail the configuration options needed in order to compile OCI and OCCI applications using NetBeans 6.8.
Start up NetBeans and create a new project by clicking the File menu option and selecting New Project.
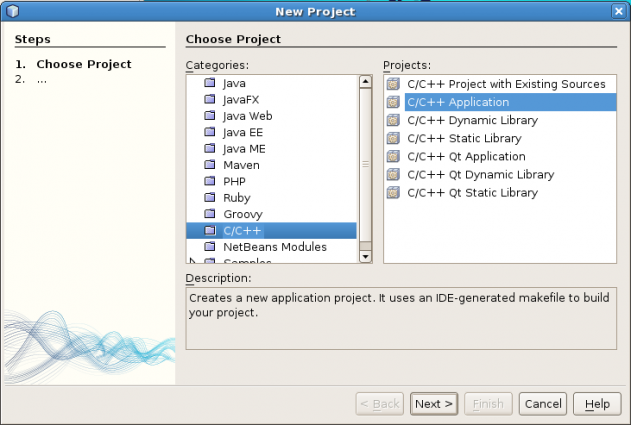
On the New Project dialog choose C/C++ under the Categories section and C/C++ Application under the Project section and click the Next button. If you have never created a C/C++ project in NetBeans you might see a notice that the feature is not active. Clicking the Next button will activate the C/C++ features.
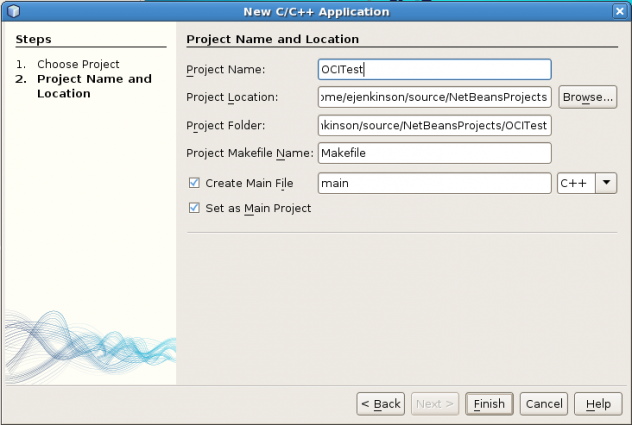
On the New C/C++ Application dialog provide a name for the project (OCITest in this example) and click the Finish button.
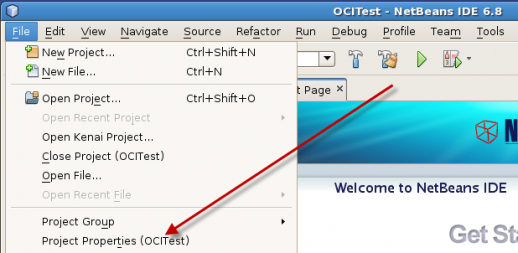
Now we need to add the Oracle OCI/OCCI library and include file locations to the project. Click the File menu option and select Project Properties (ProjectName).
Under the Build Category select C Compiler. Click the Configuration drop down and select
Under the General section click the … button to right of Include Directories.
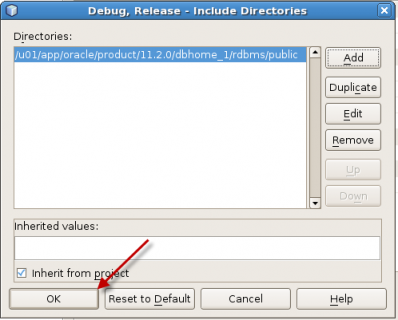
On the Debug, Release – Include Directories dialog click the Add button.
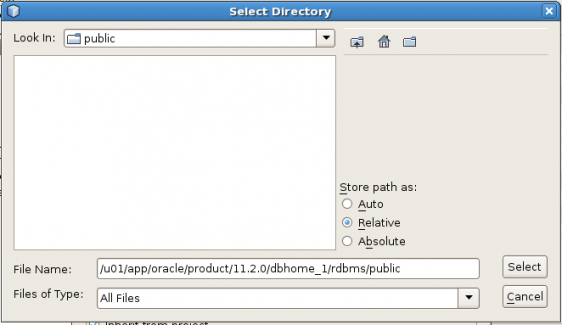
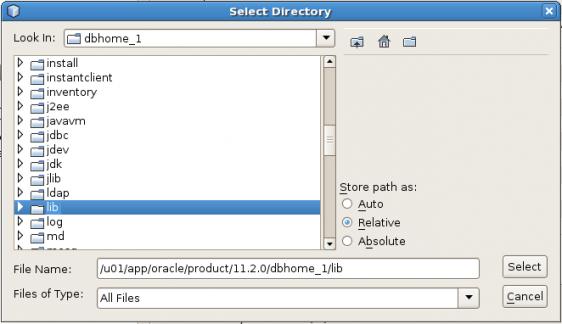
On the Select Directory dialog either browse to or type in the path to ORACLE_HOME/rdbms/public as the location for the include files. Click the Select button to continue.
You will now be returned to the Debug, Release – Include Directories dialog. Click the OK button to complete this portion.
If you are intending to build OCCI applications perform the same steps above for the C++ Complier.
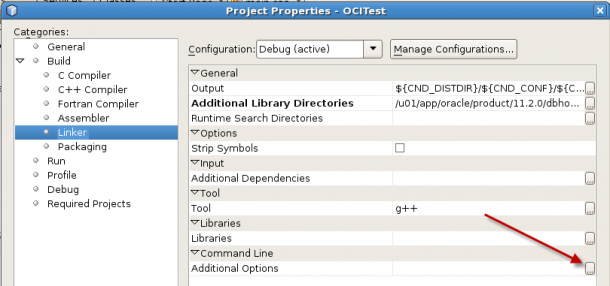
Next we will set the location to the Oracle OCI/OCCI libraries. In the Build Category select Linker. Click the … button to the right of Libraries Additional Library Directories.
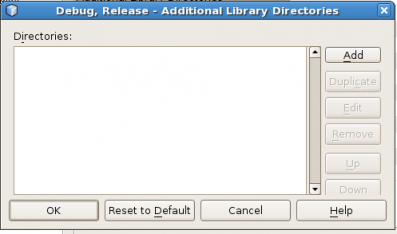
On the Debug, Release – Additional Library Directories click the Add button.
On the Select Directory dialog either browse to or type in the path to ORACLE_HOME/lib. Click the Select button to continue.
After clicking the Select button you will be returned to the Debug, Release – Additional Library Directories dialog. Click OK on the dialog to continue.
Next we need to set some command line options. For OCI programs the Oracle Client shell library needs to be added –lclntsh for OCCI programs you also have to add –locci. Click the … button to the right of Additional Options.
On the Debug, Release – Additional Options dialog add –lclntsh for OCI programs. If you are building OCCI program also add –locci. Click the OK button to continue.
To complete the setup click the Apply button on the Project Properties dialog and click the OK button to close the dialog.
You should now be able to build OCI or OCCI programs in NetBeans.
/usr/bin/gmake -f nbproject/Makefile-Debug.mk SUBPROJECTS= .clean-conf
gmake[1]: Entering directory `/u03/home/ejenkinson/source/NetBeansProjects/OCITest'
rm -f -r build/Debug
rm -f dist/Debug/GNU-Linux-x86/ocitest
gmake[1]: Leaving directory `/u03/home/ejenkinson/source/NetBeansProjects/OCITest'
CLEAN SUCCESSFUL (total time: 28ms)

/usr/bin/gmake -f nbproject/Makefile-Debug.mk SUBPROJECTS= .build-conf
gmake[1]: Entering directory `/u03/home/ejenkinson/source/NetBeansProjects/OCITest'
/usr/bin/gmake  -f nbproject/Makefile-Debug.mk dist/Debug/GNU-Linux-x86/ocitest
gmake[2]: Entering directory `/u03/home/ejenkinson/source/NetBeansProjects/OCITest'
mkdir -p build/Debug/GNU-Linux-x86
rm -f build/Debug/GNU-Linux-x86/main.o.d
g++    -c -g -I/u01/app/oracle/product/11.2.0/dbhome_1/rdbms/public -MMD -MP -MF build/Debug/GNU-Linux-x86/main.o.d -o build/Debug/GNU-Linux-x86/main.o main.cpp
mkdir -p dist/Debug/GNU-Linux-x86
g++     -lclntsh -locci -o dist/Debug/GNU-Linux-x86/ocitest build/Debug/GNU-Linux-x86/main.o -L/u01/app/oracle/product/11.2.0/dbhome_1/lib
gmake[2]: Leaving directory `/u03/home/ejenkinson/source/NetBeansProjects/OCITest'
gmake[1]: Leaving directory `/u03/home/ejenkinson/source/NetBeansProjects/OCITest'
BUILD SUCCESSFUL (total time: 364ms)


