This document will detail the steps to manually setup mass deployment of the Oracle Enterprise Manager 11gR1 Grid Control Agent for 32bit Linux systems. See the post Installing Oracle Enterprise Manager Grid Control 11gR1 on Linux.
When you install Enterprise Manager 11gR1 Grid Control the management agent is installed in OMS_HOME/sysman/agent_download/11.1.0.1.0 for host OSs matching the host in which Grid Control was installed. If you need to push the agent to other OSs you will need to download the Mass Deployment agent for each host OS from Oracle Technology Network.
Steps to push the agent
Click on the Deployments tab on the Enterprise Manager menu bar.
Scroll down the Deployments page to the Agent Installation section and click the Install Agent link.
On the Agent Deploy page you have the options of a fresh install, clone, add host to shared agent or upgrade an agent. Click the Fresh Install link at the top left of the page.
The Installation Details page is where you set information about what agent you want to push and the servers you wish to receive the agent.
You can use either the default staging directory or a custom staging directory. For this example we will use the default staging location.
You can have multiple versions of the Agent staged in the staging directory. On fresh install of Oracle Enterprise Manager 11gR1 Grid Control you will have only the 11.1.0.1.0 version.
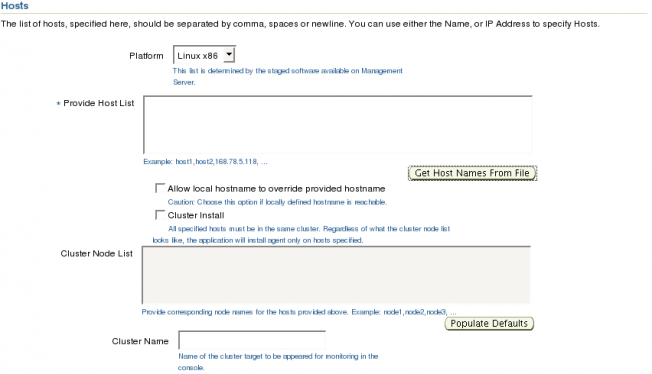
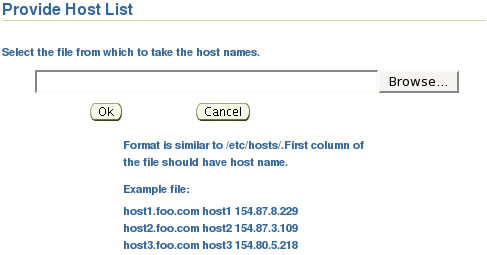
On the Hosts section you can select the platform and the list hosts in which to push the agent. If you have multiple hosts you can get the hosts names via a file by clicking the Get Host Names From File button.
You can also do a cluster install. When performing a cluster push all nodes in the Cluster Node List must be in same cluster.
You will need to provide OS credentials for the host to receive the push. In the case of pushing to multiple hosts the OS credentials must be the same on all hosts. If the host OS user has been enabled for sudo then it can run the root.sh script otherwise it can be ran manually.
For the Destination provide the base directory in which you want the agent push to build its structure. For example if you provide /u03/app/oracle the complete directory structure after the agent will be: /u03/app/oracle/agent11g. Note: if pushing to more than one host the installation base must be the same across all hosts.
If you have the need to set a specific port for the agent you can do so in the Port section.
If your environment has a load balancer you can set the load balancer host and port here.
If you know that you will need to pass command line parameters to the installation you can add them in the Additional Parameters section.
Enter the password for management server registration. If you do not have Enterprise Manager configured to require registration then you can leave this section blank.
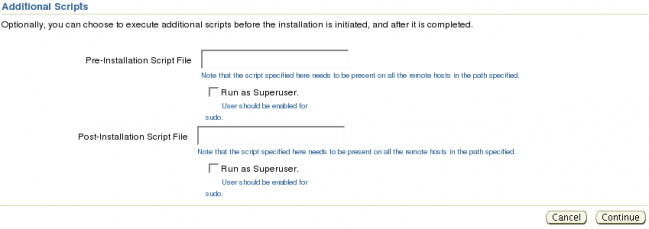
It is possible to have the push run scripts both before and after the agent install on the host. Note that if you do choose to run scripts, the scripts need to be present on each host. Now that all Installations details are set click the Continue button to continue to the My Oracle Support Details.
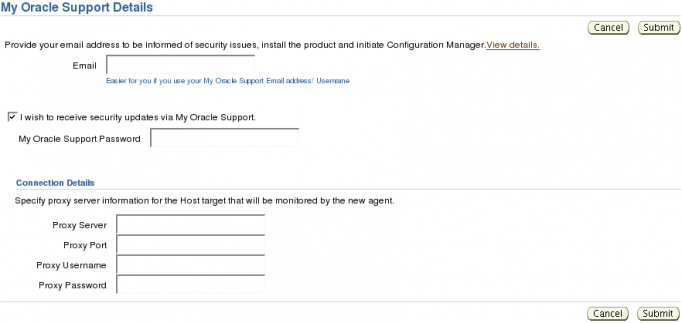
On this page you can set your My Oracle Support credentials and any proxy information needed for your hosts to access My Oracle Support. If you do not want to set this information now uncheck the “I wish receive security updates via My Oracle Support” check box. Click the Submit button to continue.
If you chose not configure updates via My Oracle Support you will receive a notice asking if you are sure about your choice. Click the Yes button to continue or No to go back and set information.
Next you will see a progress screen. Each phase of the install is listed with running progress meter at the top. Once the installation is complete a details page will be displayed next.
The header provides information on when the push was initiated.
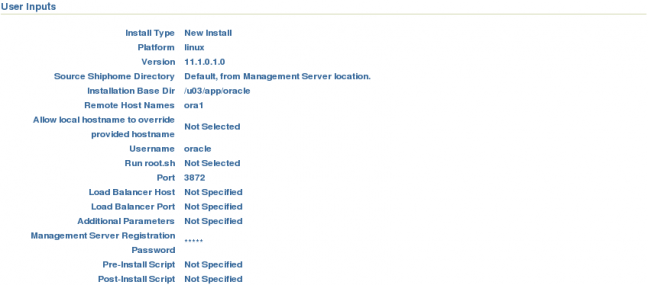
The User Inputs section details the information we provided on the Install Configuration screen.
The Prerequisite Details section lists the status of the checks and the log locations. If you want to see what each check was click the Click Here link.
At the bottom we find the Install Details section. The install status and logs are detailed in this section. Click the Done button to end the push.
Reminder: If you did not select to run the root.sh script during the install do so now on the host(s) that received the push.
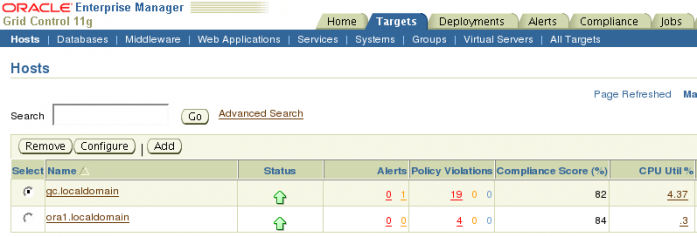
You should now see the hosts on the Hosts page under the Targets tab.
Licensing Note:
From the Oracle Database Licensing Information 11g Release 2(11.2) guide Oracle Configuration Management Pack, the steps contained in this post do not require a license for the Oracle Configuration Management Pack.








Nice Docs…