Oracle Enterprise Manager 11gR1 Grid Control greatly simplifies the creation of physical or logical standby databases. The Add Standby Database wizard provides a quick way to get a Standby database up and running in record time. This document will detail creating a Physical Standby on a remote host.
Licensing Notice: There is no mention in the Oracle Database Licensing Information book, Chapter 2 Options and Packs that suggests a Management Pack license is required when using Oracle Enterprise Manager 11gR1 Grid Control to create a standby database. However, an Oracle Database license might be required for the standby depending on your usage. Contact Oracle Sales for licensing information in your environment.
In Grid Control, navigate to the database you want to use as the primary database and click the Availability link.
About half way down the Availability page you will find the Data Guard section. Click the Add Standby Database link.
In order to create a Standby database Grid Control will need credentials for the primary database that has the SYSDBA role. If you already have Preferred Credentials configured on the primary database the user name and password fields will be pre-populated. After providing credentials or reviewing the values click the Login button to continue.
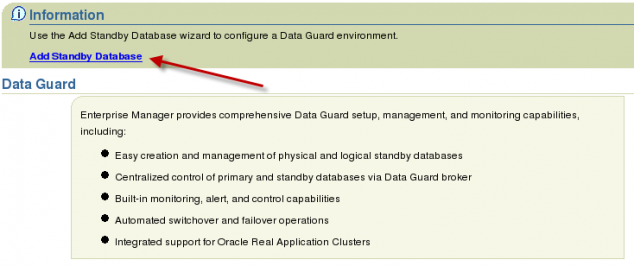
Next you will be presented page providing details on some of the benefits Enterprise Manager provides for Data Guard. Click the Add Standby Database link in the message section to continue.
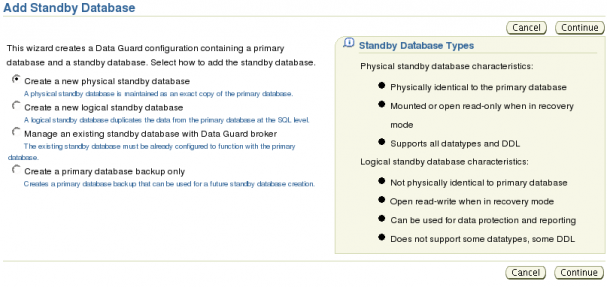
On the first screen of the wizard you can select what you to do with the Wizard. You can create a physical standby database, a logical standby database, add Data Guard broker to an existing standby database, or create a backup of the primary database to be used in future standby database creation efforts. The default option is to Create a New physical standby database. Click the Continue button to continue.
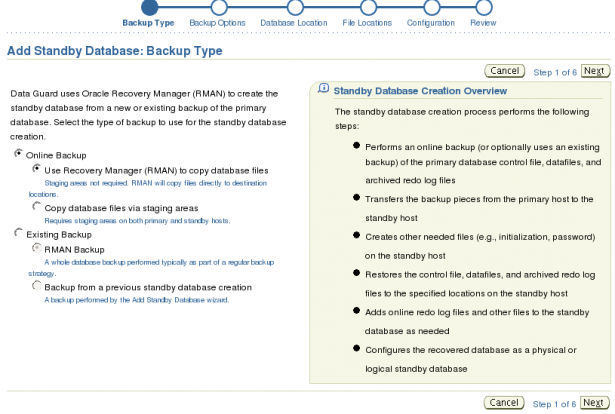
On the Backup Type page you get to choose backup method to use to create the Standby database. On this screen you can choose to use RMAN to copy the database files without a staging area, to copy the files via staging areas on both the primary and standby hosts, to use a backup created in a previous run of the Add Standby Database wizard or just create a backup to use. For this example we will use the Online Backup: Use Recovery Manager (RMAN) to copy database files option. Click the Next button to Continue.
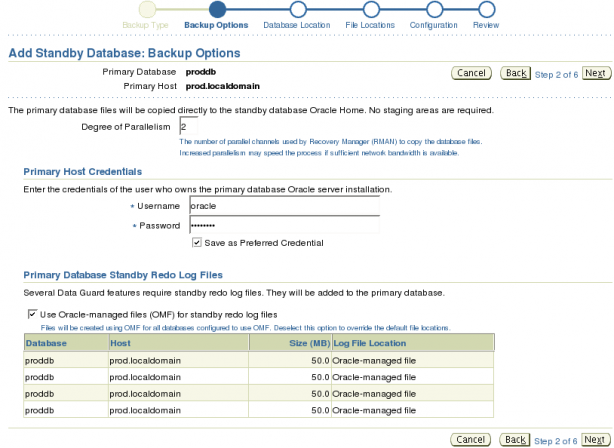
On the Backup Options page you can change the degree of parallelism used for this RMAN operation. You will also need to provide host OS credentials for the primary database host. If you have already configured preferred credentials then the user name and password fields should be pre-populated. Also note that standby redo log files will be created on the primary database. Standby redo log files will be created on both the primary and standby database. After making your changes click the Next button to continue.
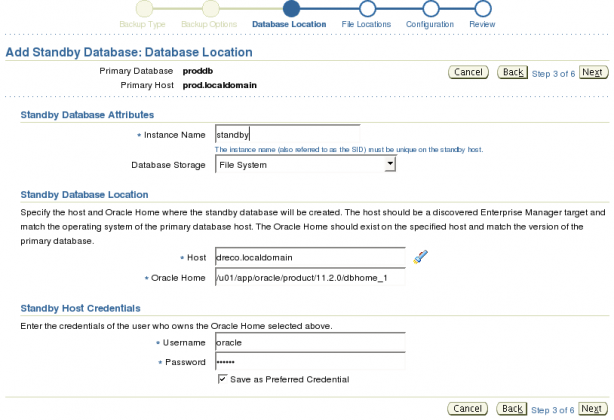
On the Database Location page you can set name for the Standby database, file system storage or ASM as well host in which the Standby will reside.
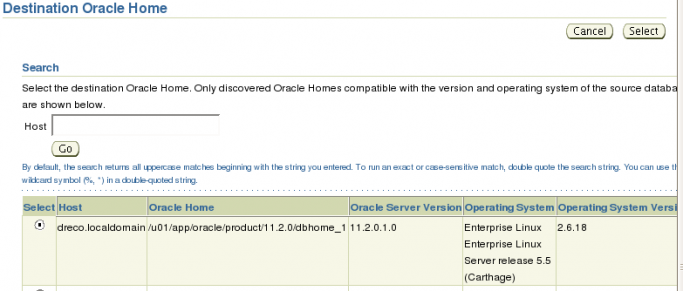
By default the host selected for the Standby is the same host in which houses the Primary. To change the host click the flashlight icon to bring up the Host selection page.
After selecting the host for the Standby database, click the Select button to be returned to the Database Location page. You will need to provide host credentials for the Standby host. After making your changes click the Next button to continue.
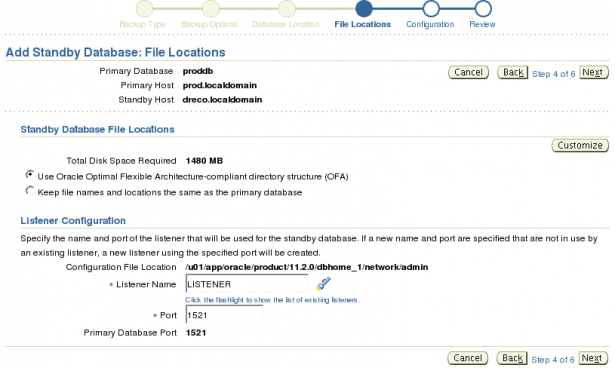
On the File Locations page you can configure the file locations and the Listener. For the file locations you can choose use an OFA compliant directory structure or keep the file names and locations the same as the primary database. You can further customize locations and files at more granule file level by clicking the Customize button. For this example we left the options at their default. Click the Next button to continue.
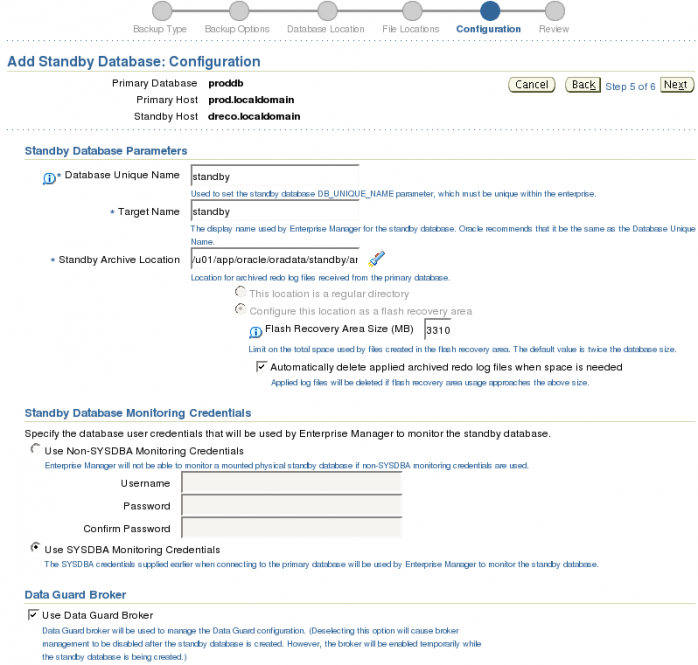
On the Configuration Page you set standby database unique name (DB_UNIQUE_NAME), target name and archive log location. If you want to use Enterprise Manager to monitor the standby database that is mounted you will need to use monitoring credentials that have the SYSDBA role. Note: The credentials provided earlier that had the SYSDBA role will be used to monitor the Standby database. Click the Next button to continue.
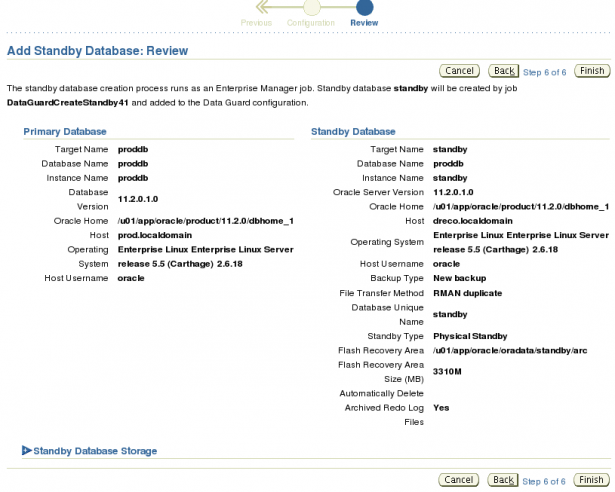
The Review page is your last chance to review the choices made prior to creating the job to build the Standby database.
If you find that you need to make changes click the Back button to go back to any pages in which need to make changes, otherwise click the Finish button to continue.
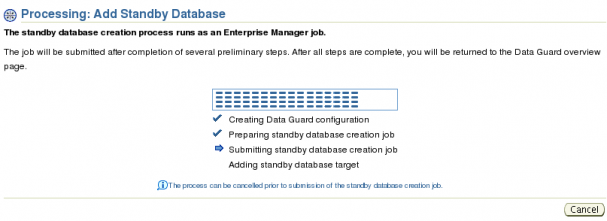
After clicking the Finish button the processing page will be displayed.
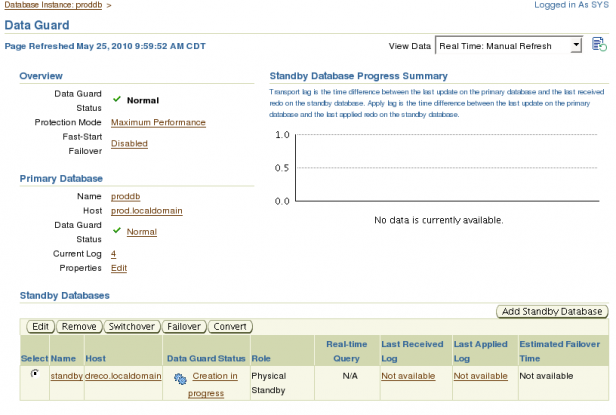
Once processing is complete the Data Guard page will be displayed.
Notice the Data Guard Status shows that the creation is still in progress. Change the refresh settings from Real Time: Manual Refresh to Real Time: 30 Second Refresh.
After a while Standby creation process will be complete and the Data Guard Status will be normal.
If you click on the primary database name in the Primary Database section you will be taken to the Database Instance page for the primary database.
On the Database Instance page for the primary database you will notice that under the High Availability section Data Guard has a green check mark beside it.
You now have a physical standby database that is up and active and already registered with Oracle Enterprise Manager 11gR1 Grid Control.
If you want to see all the work that Oracle Enterprise Manager 11gR1 Grid Control did to create the physical standby database click the Jobs tab and set the Status to Succeeded.
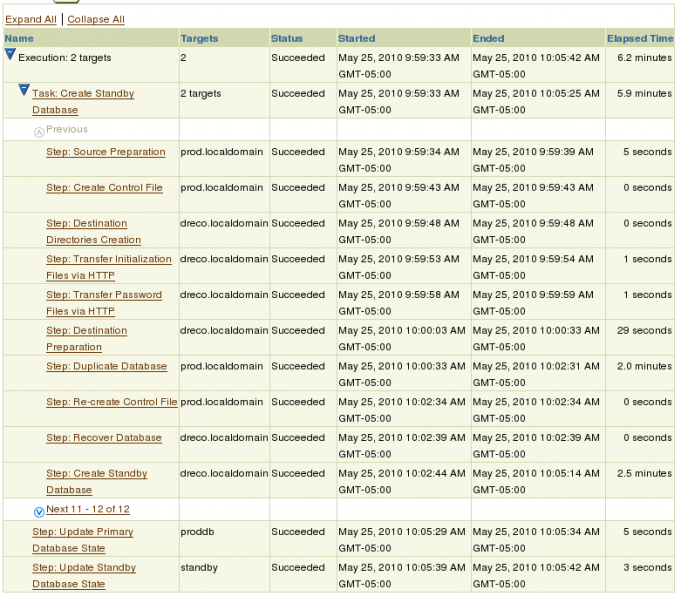
You should see a job with a name that starts with DATAGUARDCREATESTANDBY with a status of Succeeded. Click on that link to go to the summary page.
On the summary page you can drill down into each step performed to create the standby database.
In future posts we will use this Standby to demonstrate many of the features provided in Oracle Enterprise Manager 11gR1 Grid Control to support a Data Guard environment.




I read your post, I did as instructed but when I’m on Oracle Enterprise Manager 11g. selected data availability but no guard. ask yourself what can install up to half guard is not your data. thank you
Issue the following RMAN comdanms to restore the generated/copied Standby Control file into the Standby Database on ASM:SQL> startup nomount;RMAN> restore controlfile to +DATA1/ORADB01/controlfile/Current.142.584657123 from /usr/tmp/oradb01.yourstandbycontrolfilename.ctl;Repeat the above RMAN command for all other copies of the Controlfile.And you’re done
I understand this is an old post, but it is the best step by step guide I could locate. I followed your instructions but using EM12C. When I click finish on step 6 I am simply returned to 1st screen shot and no job is created and obliviously no standby is created.
Where can I check for logs or alerts? Or any suggestions on why job is not being created. Jobs for other tasks work fine.
Regards
James.